Week 5 by Annie Silverman

For this week, we completed readings about Paulo Freire’s philosophy of teaching. When he was young, he found a need for literacy in the lower class, which inspired him to dedicate his life to finding a solution. Freire ended up teaching adults how to read in 45 days. He believed that education was a way to rise above poverty. His method of teaching people how to read was personalized to the group of people that he was working with. He identified the needs of the group in terms of what they wanted to learn and what they needed to learn to be successful in their field. With this information, he was able to tailor the lessons to the group and knew that they would care about what they were learning. Overall, Freire’s philosophy is that education belongs to everyone, no matter what their background is. The goal of education is to raise the consciousness of the human being through the problematization of their existence, reducing naiveté, and becoming more critical about their reality. A contemporary example of this are the programs that teach CS for all. Their goal is for people to understand the devices and internet services they use daily; which highlights the right for people to learn about the things they use everyday, and to become critical thinkers about their realities.

As the discussion progressed, we were asked to think about the connection between politics and education. Besides the overall issue of accessibility to education based on politics, there are connections closer to the classroom. I immediately thought of a passage that I was assigned in another class about how to promote democracy in the art classroom. It highlighted how the way people are taught can contribute to their understanding of what democracy is. By giving students the freedom to express themselves and make choices, a teacher is demonstrating a democracy. While reading about Paulo Freire, there was a concept that came up called banking. The banking concept says that teachers teach as if they know everything and the students know nothing, as if they are making some sort of transaction where knowledge is a privilege that teachers hold over students. This kind of pedagogy does not promote a democratic society. It is usually the teacher’s individual pedagogy and the school culture that determines the kind of political society that is demonstrated.

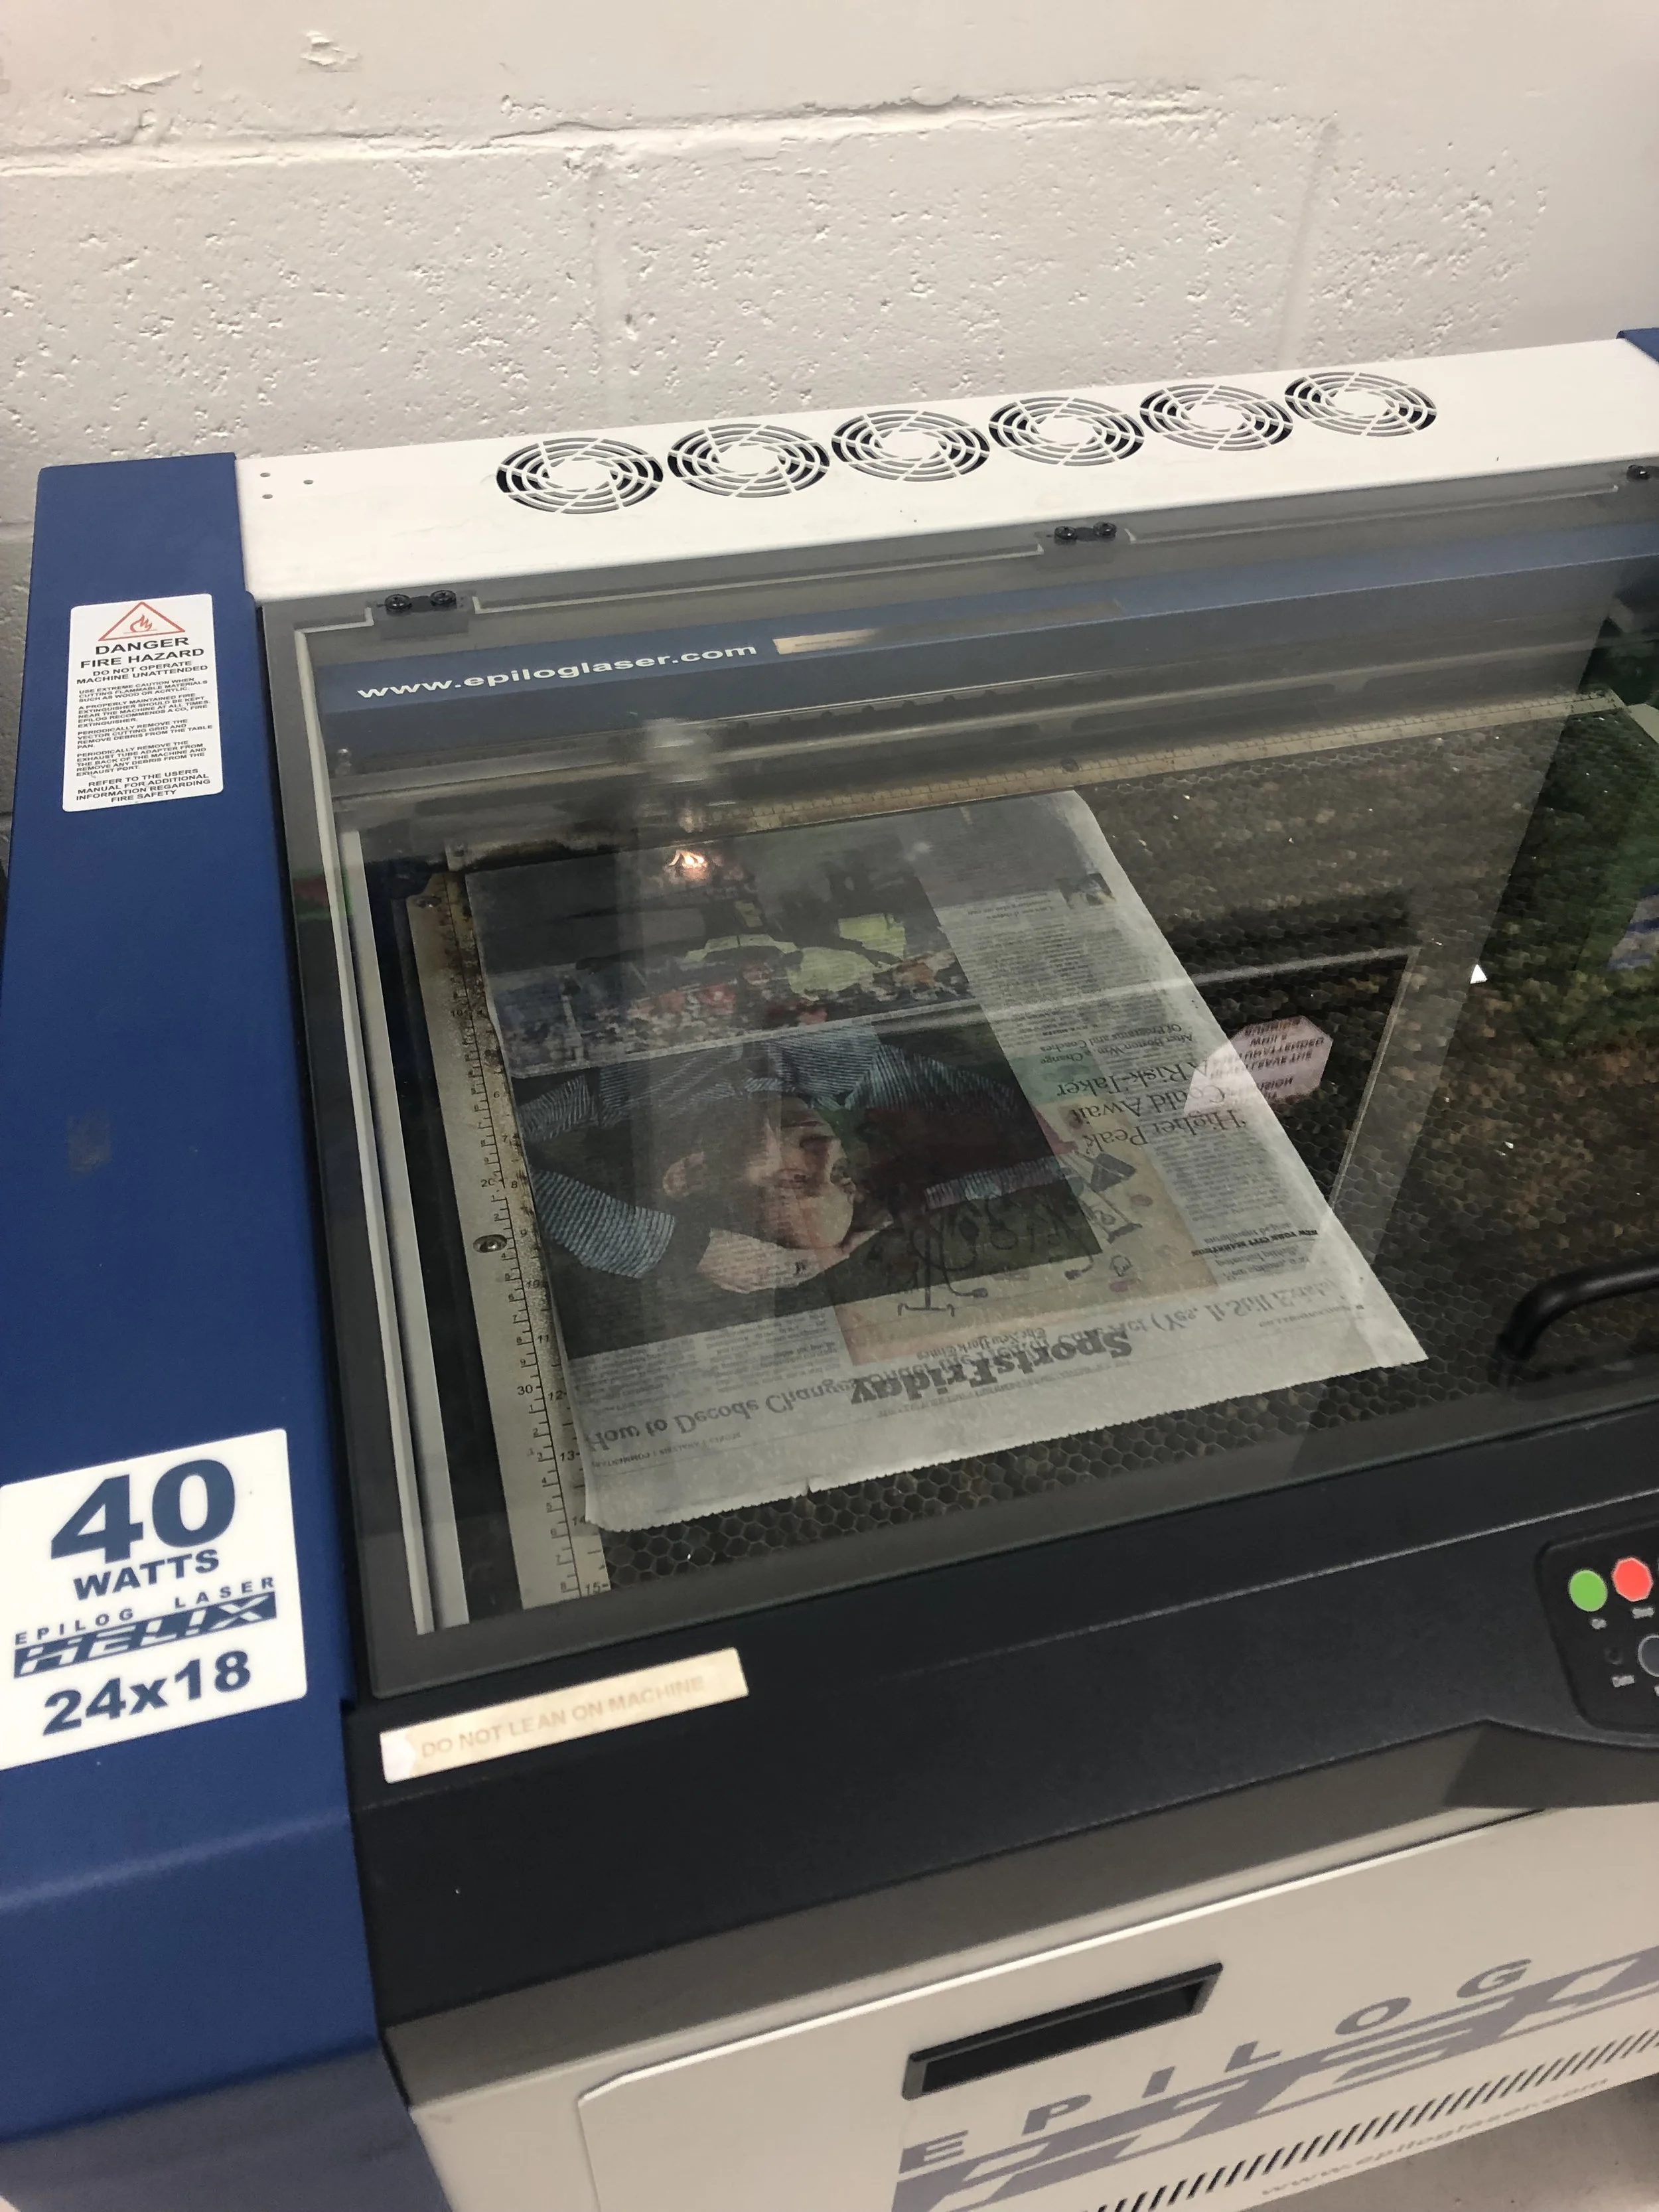
We then discussed ways that technology can lend itself in promoting a democratic society. While it was generally agreed that technology could offer students choices and freedom, it was also noted that the technology had to be used with intention. I mean, that technology could not be used for technology’s sake, it has to be used mindfully. Just because a school has access to iPads doesn’t make the students use it to deepen their learning. I believe that it is the teacher’s job to find a way to use the technology that benefits learning. Because, regardless of what the technology was designed to do, students usually find another way to use its functions. With that in mind, it becomes the teachers job to regulate and guide their learning using the technology, while hopefully inspiring them to find other ways to use the technology to their advantage. (Which reminds me of my experience in my elementary technology class that gave me the freedom to explore and use a computer program differently than what was intended.)

One way of doing this is by making the learning relevant to what kinds of technology students use and their interests. In another class, I co-wrote a lesson sequence about students using iPhones to make their own creative content like they see on social media. In this way, students are learning formal filmmaking skills, but also feeling like they can be included in the technological world around them, which is important for adolescents to feel noticed. I believe that with the power of engagement in materials, a teacher can create a successful lesson like that one. I also know how difficult it could be for some to think about technology in another way than its intended function. While it is not easy in certain subjects, I fully believe that it is the teachers job to do so in order to keep up with society.

Week 4 by Annie Silverman

In class, we focused on the readings from last week and this week that brought the theories of how children learn from Piaget, Papert, and Vygotsky.

Papert discussed the importance of tools, media, and context in human development. He found that these tools were in conversation with the people who made them. By humans engaging in material to make and use these technologies, they learn more. In maker education, a student should be guided by the teacher to learn by exploring with trial and error. Then, taking time to step back and reflect about the processes that they discovered so that they understand what they accomplished. Reflection is what makes the learning deeper and meaningful. Unlike Piaget, Papert did not believe that cognitive development is a linear process. Papert believed that constantly engaging in the world around you makes you a constant learner. This makes cognition into a cycle from concrete to abstract in every learning situation.

Today’s class discussion reminded me of lectures by Judy Burton in the art education program. She speaks about how children need time to reflect on the processes that they used while making in order to dedicate it to their knowledge/repertoire of artistic skills. Without the reflection component of the lesson, they will not be able to commit it to their memories as a technique learned that they could apply in other situations. This prompted me to wonder how a teacher could influence students in art education to realize their processes while making. I was taught that students should be engaged in discussion and open-ended questions to inspire their imaginations for what they could do with material. I thought that getting students to realize this cognitive process is a different arena entirely. One solution that I have seen in schools before, is to keep a journal or blog during the making process. Another solution was to hold meaningful critiques. Critiques are sessions of discussion in a class that is lead/monitored by the teacher. They traditionally have students put their work in the spotlight one by one, while the artist and the rest of the class make comments, ask questions, and make suggestions. But, I find that a lot of students find them boring. Some students sit quietly and listen, while other are engaged and responding to each prompt. I find that most students are bored and not actively listening. One way that this could be combated is by having students take reflective notes on each project during the conversation to be handed in later. Or to have them choose one piece that resonated with them and write a response to it later. These critiques could also be done multiple times over the course of making, to take the pressure off of the final/only discussion at the end. In that way, maybe students would be more invested in their own and their peers artwork.

What I really love about auditing this class, are all of the connections I make to what I know about art education thus far. It is making me realize that there is a lot of shared knowledge between theory in technology and art. I hope that continuing in this class will inspire my future teaching practice in ways that will make me stand out from other art teachers.

The activity for class was to make a visual representation of a theory listed in the presentation. Our group was inspired by Piaget’s theory of cognitive development, which focused on assimilation and accommodation. Through interactions with a person’s environment, the person constructs knowledge by using adaption, which is the interplay of assimilation and accommodation. Assimilation is applying knowledge to a “new situation” by simplifying the “new situation” to fit within the understandings in your mind. Accommodation is altering your existing knowledge to develop more complex categories in your mind, which changes your cognitive structures in order to learn something new. This prompted us to draw a duck to show how a child would understand what a duck is. First, the duck they could be introduced to is one in the tub. Next, the child would be read a book about a duck, which allows the child to assimilate the drawing of the duck into their own understanding of what a duck is. Then, a child could go to a pack and see a duck fly. In this case, the child would have to change their thinking/categorization of what a duck is to understand there are different kinds of ducks.

IMG_1093.jpeg

Physics Simulation Particle Edits by Annie Silverman

Since I started playing around with the simulation, I discovered interesting things about the images. While I do not understand the python code that created the physics simulation, I do somewhat understand what it is doing. First, I discovered that the images are a lot bigger than they seem on my screen. When I opened the image up in Adobe Illustrator, I found that the vector points stretch well beyond the artboard. (Depending on the design the simulation created, it went even further than my screen could handle.) The artboard is only 11.11in x 11.11in, which definitely made the full particle design bigger and more complex than what I was originally seeing.

This is a screen shot of what Adobe Illustrator looked like. The small white box is the artboard, what was seen on the screen when I first saw the simulation running.

This is a screen shot of what Adobe Illustrator looked like. The small white box is the artboard, what was seen on the screen when I first saw the simulation running.

As I started to edit the images, I took out the excess vector points that went off of the artboard. Partly because they were not as visually interesting as the rest of the piece, but also because I wanted to keep it authentic to my first experience seeing the simulation. With the first piece that I edited, I found that it was similar to a project I did in my undergrad career where we changed an imaged into polygonal geometric designs.

This is the polygonal design I created based off of a doodle I made in high school. I always like going back to my old artworks when doing something different, or just in general for inspiration. The original was done in pencil and ball point pen on a lined piece of notebook paper. Then I recreated it on water color paper with water color paints, pen/ink, and salt. The salt was put strategically onto the surface before and after I was painting to get cool effects of color and texture. I find that reinterpreting an image different ways was an open way of exploring new techniques and skills that I would not have been able to gain in teacher-centered lessons or “transmittable” experiences, the experience I had with materials would not have been as rich. But, what should be noted is that I did this on my own. I was not prompted/inspired by a teacher to make an image like this or recreate it in watercolor. The only result of teacher influence was to make it into a polygonal design, which was originally assigned to us as a polygonal portrait of a person. I have always been a student to take creative assignments into my own hands to make it more fun and more me, so that’s what I did. I hope that I could empower my students to do the same in open exploration so they could find their own techniques like I did.

Instead of creating the shapes myself, I was selecting the shapes made from the program and coloring them how I saw fit. As I was doing this, I found that some of the shapes were hidden behind the others. In other words, the simulation was showing me a two-dimensional image, when it was really a three-dimensional “thing.” (Or was this dependent on the order that I turned on the visual filters on the simulation? Or was it the way that the file was being interpreted?) I am hoping that as I continue my side project, I understand how these results should be understood as objects rather than a flat digital thing. Maybe, I could interpret it to the point where I could create a 3D printed model of one of them.

“Particle 8”

Below are pictures of some of the edits I made. The first four are of the same particle design. Each image shows the different layers of the image so you can fully see what they look like. With this edit, “particle 8,” I tried to make it a slight variation from the original image. Each layer/section of shapes were colored in various shades of their original color. I also arranged the colors so that it would give the images look more three-dimensional.

particles8.jpg
In this version, I made the yellow vector drawing into black holes.

In this version, I made the yellow vector drawing into black holes.

In this version, I made the yellow vector drawing into black holes while showing another layer with the yellow vector lines to define the shapes.

In this version, I made the yellow vector drawing into black holes while showing another layer with the yellow vector lines to define the shapes.

Week 3 by Annie Silverman

During class, we discussed the way that students think and how they might be taught. We began by covering what behaviorism is, which is detailed in Catherine Twomey Fosnot and Randall Stewart Perry’s Constructivism: A Psychological Theory of Learning (2005). Behaviorism is the theory that learning is based in peoples’ behavioral responses to physical stimuli (p. 1). The learner is assumed to be a passive, and will not learn unless they have incentive to. These incentives lead to learners being shaped by their environment since they need external motivation to learn. The catalyst for learning creates specific behaviors that the environment encourages. When behaviorist learners are assessed, and respond correctly, it is assumed that they know the content. The content that they regurgitate is evidence of the mastery of behavior that they were positively enforced to follow. It would be a leap to assume that a learner truly knows something if they only respond with the right answer. The conversation continued to examples of how this theory was viewed by others over time. BF Skinner, the “father of behaviorism.” He did a study that involved training pigeons to play ping pong. He did this with positive reinforcement, which awarded the pigeon who knocked the ball off of the table with food. This study proved to others that complex behaviors could be taught through rewards. In short, knowledge is learned through behavioral reinforcements. While it is a valid theory in some circumstances, it is not the key to keep learning and creating a life long learner. This is particularly important today because of the need for students to develop 21st Century Skills. These are the more complex skills that are needed to succeed in today’s world, which are not achieved unless deeper learning takes place. This kind of learning is needed to apply knowledge in various situations.

After discussing the readings and what is required for deeper learning, we did an activity where we organized statements into categories that describes the learner, describes the learning process, and describes the nature of knowledge. Then, we analyzed the big ideas, tensions of ideas, and questions from the statements. From this activity, I was able to better understand the differences between the behaviorist and constructivist theories. Since it was a group activity, it was also helpful to talk to others about what they thought about the statements and the theories overall. After organizing, we engaged in a discussion that reinforced the idea that knowledge cannot be told to someone, and be expected to have deeply understood what they were told. True understanding of a subject would allow students to transfer their knowledge of one subject to another in order to enrich both experiences. It also suggested that learning takes place indirectly, and the counter argument that if two children are demonstrating the same knowledge if taught the behaviorist method, then what validity does the constructivist method have?

While the discussion went on, I was constantly reminded of the lessons I learned in my own program. As John Dewey, educator and philosopher, said “learning by doing” is essential for students, my program advocates for children learning through experiences made for them by teachers. I was also reminded of a class I was in last semester called, Technology and School Change. Specifically, while discussing school change, it was concluded that school culture has a huge influence on overall change. If a single teacher wants to encourage learning for learning’s sake in a school that is run by behaviorist theory, then their efforts will surely fail. This reminds me that regardless of constructivist theory having “no structure,” there needs to be a structure/system that values that kind of learning. Without it, students would not be deep learners. On the other hand, one could say that that is just a form of behaviorism where students are rewarded by their desire for learning.

Personally, this debate inspires me to find a balance between both theories. I find myself back at the same dilemma with my own artistic development. During my grade school years, I was motivated by the praise of others and grades. I was taught all of the technical skills of art, which gave me the gift to represent the relationship I have with the world around me. While this kind of learning gave me the tools to do this, they did not teach me how. Which is a skill I am still working on today. For the longest time, I thought that the only kind of art was “art for arts sake.” It confused me when I was in my undergraduate program and professors were criticizing my work for not having a “point” to it. (Their criticism did not give me the help I needed for expressing myself deeper, but they criticized my work anyways.) It was not until I came to Teachers College where I began to create more works that were more personal to me and my experiences. I felt safer to do so, and am thankful for the skills I have learned over the years to accomplish exactly what I wanted. I also feel confident to explore different techniques in various materials as well. Point being, my artistic development has been shaped by both behaviorist and constructivist methods. I know that deeper learning took place in a constructivist environment, where that kind of learning was appropriate/accepted. But, I am not sure it would have worked fully in my high school environment. It also troubles me that I would not be as successful as I am (artistically) if not for my grade school education, and the many out of school classes I attended. Again, where is the balance? My art education program teaches us that students will learn the technical skills if they are able to openly explore materials and ideas with the guidance of teachers, and I agree. I am still learning about how to insert technique and skill into open-ended lessons.

Towards the end of class, we watched videos that demonstrated Jean Piaget’s theory of cognitive development. In one of them, a 3yr old girl was asked to draw a picture of a triangle after looking at another drawing of a triangle. There was no other instruction but to draw it. The child drew an amorphic shape that had some semblance of three corners. It made me think about the ways that I could have helped that child’s development, cognitively and artistically. I would have had the child describe to me what she saw, then trace it with her fingers, and maybe hold a triangular object. I am not sure what would happen, but based on what I know about children and their capacity for learning through touch and the environment around them, I hope that it would improve her drawing. In that way, she would have had a better understanding of what a triangle is through the open exploration and guidance by a teacher. This reminds me of the experience I had in my technology class during elementary school. While I was able to find a new technique on the program we were exploring, I do not remember much else. It probably means that the teach did not foster this kind of learning further than the lesson that day. With these two ideas in mind, it is important for me to remember that in a sequence of lessons, a teacher should be recalling skills students learned in other lessons and encouraging reflection from students to get them to understand what they learned.

Week 2 by Annie Silverman

As stated in the previous post, I expected to question many more aspects within the realm of technology and art education. This is exactly what happened this week.

At the end of the last week, we were left thinking about objects or events in our life that drove our passions and informed our thinking process. During class, we discussed a few passages that other students wrote. From this, I found that a lot of people were inspired by their interests and focused on the exploration aspect of learning. Most people were excited about the feeling of playing with an idea or tool, and finding out something extraordinary that they could do with it. As the discussion went on, a student brought up an interesting point about the best way to inspire that intuitive/exploratory thinking in students when they approach projects. At first, it was definitely a head stumper. But then I thought back to my time in the art education department.

In my program, we often talk about how to engage students in art making. When students begin projects, teachers should engage them in a dialogue. These dialogues should entice the students into find their interests within the prompt. (The project should call upon the students interests, regardless of the dialogue.) During the dialogues, they would ask students open ended questions. For example, if they were working with clay, a teacher might ask them, “How many ways can you change the shape of the clay? What about the texture?” From there, students would explore the material on their own terms and interact with it freely with the direction in mind: how can I change this piece of clay? After exploration, students would be asked to share what they found and teach each other their techniques. This way, students show their understanding of the material with each other and prove to teachers that they are using it effectively. If there is a direct learning goal in mind for a technique, the time to do it would be after they explore/play. This way, a teacher is not negating the personal experience they had with the clay, they would just add to their repertoire of skills. Following material exploration, students would be starting to think in terms of the project. Depending on the subject, the teacher would continue to ask them open-ended questions that make them think about their own lives/experiences that could relate to the prompt. From there, students would be aided by the teacher to make their artworks.

Based on what I know about dialogues in lessons, I was able to deduct a theory about how to keep students engaged in the same way with STEM (Science, Technology, Engineering, and Math) classes. Conducting an effective dialogue that engages the students interests with the problem in front of them should help inspire them to work on it, and enable their problem solving skills.

During class, we also touched on cognitive development and its influence in how people learn. This reminded me of my time in the developmental psychology of adolescents class that I took last semester. The connection between how people think and how people learn seems obvious, but why don’t all teachers do this then? (But, that’s a point to be explored another day.) What I found interesting was how the role of technology could be looked at, in terms of a students cognitive development. While reading Mindstorms (1980), by Seymour Papert, it is detailed about his outlook on Piaget’s theories about concrete and formal operational thinking. Concrete operational thinking is a developmental step that Piaget theorized children go through. This means that they are not able to think deeper and in terms of future possibilities, in other words, they only see what is in front of them. Formal operational thinking happens later in development, where an individual is able to consider notions that have not happened yet. They are able to think more abstractly and make connections that they would not have been able to make before. Understanding how people develop their cognitive abilities is important when creating lessons for students, after all, you would not want to try to teach something that is too easy or too over their heads to comprehend. Papert believes that abstract concepts, that are only understood by formal operational thinkers, can be understood concretely with the help of technology (p. 21).

I feel on the fence about his statement about the benefit of technology. In one lens, it is important to challenge students to stretch their cognitive development, but not until the point where information goes into one ear and out the other. I see how technology can take abstract notions and simplify it, but I do not see the benefit of that in the long run. Deep learning happens when a student is learning on their own terms so that it resonates with them. But, I worry about how a piece of technology giving them the “answer” in simpler terms could help them apply that knowledge to other aspects of a larger concept. In this way, students would be relying on the technology to complete the section of information they do not fully understand. How could that be beneficial for their learning if the abstract concept is not presented in its intended manner? Why push a concept onto them that they would not understand if not for a piece of technology? I would need another perspective to convince me otherwise. Although, I do believe that technology could be used as a tool to accomplish learning objectives, it should not be used to give students answers they are not cognitively developed to understand.

Towards the end of class, we had the opportunity to work with a physics simulation that used code, Python. This was my first time working with a program like this. There was basic instruction about how to use the main features of the program, along with a basic demo. Based on my lack of knowledge about code and physics, I interpreted the demo as, “Click in or around the grid and it will move. If you look at the code, you can toggle with features and the grid will change.” With this premise, I moved forward fearlessly. I eventually understood what each toggle feature was, but not necessarily how the code worked to change the image or why it moved the way it did. But, I was still proud that I figured out how to change it at all. I began thinking about ways that I could take the moving image in another direction. If I knew how to code at all, I would have tried changing it to do something else. Since I don’t, I found a button that could be pressed to take a still photo of the moving grid. With this, I couldn’t help but wonder how I could apply it to an art project. I thought about how I could combine, replicate, and edit the images aside from the code. What if I translated the digital image into a printed photo? What if I painted it? What if I tried to replicate the functions of code in another medium? So many ideas began flowing about how students could learn about composition and design by using that program, then understanding what the design means in terms of physics.

As a challenge for myself, I decided to edit some photos myself. When the images are saved from the program, they are .svg files. When I tried to open the files, it automatically opened in Adobe Illustrator. Discovering this propelled me into another brain storm of ideas of what I could do with these images. I began to explore how the image was being read in Illustrator, and saw that it was made up of pen points. Using the pen tool in Illustrator is something I am well versed in, and began to edit it. I kept thinking, “How could I change it completely? How could I change it slightly to be more visually pleasing? To what end could I change the image to still be within the constraints of the code? What would it look like if I completely ignored the code and worked with the fundamental principles of design?” The list goes on and on about what I could do with these few photos. The grid below shows pictures of the original screen grabs. The following photos are edits that I have made.

particles10.jpg

Week 1 by Annie Silverman

I first found out about “Beyond Bits and Atoms” (BBA) from friends I made last semester in the course “Technology and School Change.” The course was only advertised to students that are in the MSTU major at Teachers College, which is why I did not plan on taking it before. The course was brought to Teachers College from Stanford after nine years of success. Many of the students that have went through the course went on to creating their own companies based on the final projects they developed in class. The course is about using creative technologies effectively in education, which I should note, is the most simplified description of the class I could come up with.

I was hoping that by taking this course, I would better understand how to use creative technologies so that I could relevantly use them in an art classroom. I find that the “new thing” for art education is to survive in education by using technology in the curriculum. By “survive” I mean that they are saved from being cut from schools. Whether it be because a school does not see the value of art, or because of budget evaluations. Many believe that revamping art education to include “21st century learning” (technology) will save them. But, there is also the issue of getting a budget to fund those new technologies. So, there are two aspects to consider. One, make sure that the technology being introduced is relevant to students’ learning, and not just for technologies sake. Second, to make sure that it is cost effective. With these considerations in mind, I hope that I find answers in this course and inquire more about technology in art education as I am exposed to more information.

Because of scheduling conflicts, I was not able to enroll officially, but I was given the opportunity to audit the course. The following posts will detail my journey and reflections in the class.

SELFIE Reflections by Annie Silverman

Showed my process:

Throughout this semester, I have shown my art making process in every blog post I have done. Each post was filled with photos that either showed my screen set up or the piece that I was working on in front of me. Since starting at Teachers College a year ago, I have understood the value of reflection and documentation. For example, this semester I became the first person in Teachers College to etch into glass. Thankfully, I have documented the entire process, my successes and failures. I have also written about what I thought I could do better or how I could have taken the process further.

Explained my outcome:
While writing my reflective blog posts, I had also tried to provide examples and explain why things happened the way they did. In addition to adding photos to my posts, I was able to realize what steps I took to get to my outcome. Especially in my final project post, I have detailed instructions about how I came to the outcome I have, even the part about how my project shattered.
Linked to vocabulary:
In terms of vocabulary, I have learned a lot during the circuits portion of class. During Sarah's presentation, I learned about the positive and negative sides of circuits and how they should be lined up with each other to complete the circuit. During this class, I also learned about other types of technology that could be used in the art room. I was particularly interested in the Makey Makey, and how any object could be turned into a "button" or "switch" to make another computer program work. Although it was confusing to understand at first, I learned that someone needs to be "grounded" or "earth" for the circuit because when touching the objects, you physically need to be part of the circuit to complete it.
Found multiple possibilities:
Throughout the semester, every project that I have worked on, I have connected to activities that could be completed in class. I have also tried to think about ways that they could be connected to another medium, usually a fine art medium. Personally, I feel like the future of art classes should have a mix of fine art and new media. This was also confirmed to me last year during Judy's class when she brought in a group of high school art students who explained that while they appreciate new technologies in art, they also love working with their hands in fine art. They also liked the tradition/history behind working with fine art mediums. Overall, I have found different ways to connect each new medium to a fine art medium that would be part of the making process or be part of the product of the project.
Ipreserved through the work:
I found that during every creative assignment, I tried to keep my own interests in the projects. Each project was either connected to one of my interests, my artistic process, or my future classroom. I find that in any project that I do, I want to keep myself in it so that I am able to get more out of it. I also find that I am more interested in doing well and learn a lot more about the new process that I am learning.
Eliminated carelessness:
As the projects went on, I have been able to fine tune my work aesthetically. While working in the artistic medium, it is not only process but the way that things look that should be considered. As shown in my final project, I faced a lot of challenges when working with a medium that I have not used before/working with a process that was not shown to me. Because of the laser cutting project I completed before, I found that it was not enough to go through the motions, but make sure that I am paying attention to the process and not making silly mistakes. So, when working on my final project, I triple checked all of the parameters to make sure that there would be no burnt places and no fires would start. In the end, my effort paid off and I was able to create a flawless etched piece.
Finding ways to include new media in the art class:
Because of the way that this class is set up, I have been able to see a lot of potential for technology-infused materials for art making in classrooms. Each week, our blogs called for us to reflect and analyze on the new media that we used. As mentioned before, I have found a way to connect each medium with a traditional fine art medium, which allows for more possibilities in future lessons.
In terms of my learning objectives, I believe that I have succeeded at completing them. They are listed below:

  1. Increase Artistic Literacy of New Media: Throughout the semester, I have used and been exposed to new media that I was not comfortable with. Although I wish that I had more time to explore these mediums, I learned the basics of how they work so that I could explore them on my own.

  2. Learn About How Other Artists and Educators Implement New Media into Practice: During the week that I was the digital steward, I found a lot of artists/artist groups that used the laser cutter in ways that I have not imagined before. Although a lot of the artists used it to create kitch like crafts, I think that the artistry is in the process of making because of the natural complexity of using the laser cutter. In addition to these artists, each week my classmates found artists that used the new media in different ways. In all, I think that I have seen many ideas of how to use the mediums so that it will be able to put it into my artistic and teaching practice.

  3. Practice Collaboration Among Artists and Educators: Something that I am very thankful for in this class are the opportunities we had to work with others for creative assignments, and in the same space in general. Because of the communal nature of the Thingspace, I was thankful for being able to ask others about their process of making and what worked for them. Working with a partner was also great because sometimes a partner will bring new idea to the project that you would no t have on your own. For example, when working on the circuits creative assignment, I would not have thought about basing our design off of an abstract work of art if . Grace had not reminded me of Sarah's presentation and how other artists have included LED's to their artwork.

Circuits: LED by Annie Silverman

For the circuits creative project, I worked with Grace. Af first, we wanted to create a circuit that lit up Rudolph the Red Nosed Reindeer's nose when you closed the circuit somewhere near the reigns. Then, when we finally started to work on the project, realized that we are both Jewish and should try to create a menorah instead. The concept was much easier said than done. When trying to execute the project, it was difficult to figure out how to put multiple LED's onto one circuit. Finally, we decided to make an abstract piece so that it moved away from the representational aspect, which was an idea from Sarah's presentation that showed how you could incorporate circuits to fine art.

Our abstract collage in process.

Our abstract collage in process.

Before we started working with the idea of an abstract work of art, we started by figuring out how to create a simple circuit. Once we did that, we wanted to add another light to the piece to make it look more interesting. But, we ran into the same issue of not knowing how to put two LED's onto one circuit, and we did not want to use another battery to power the circuit. We knew that we could look up online how to simply put another LED onto the circuit, but we wanted to figure it out our own way. I figured that we should just make another simple circuit around the one that we already created but so that it was still meeting at the same point of the battery as the other one. Which basically meant, making two ovals that had one part of both of them closer than the other. Fortunately, the idea worked and one battery could power both of the LED's. The only issue was that they did not always light up at the same time based on how the conductive tape was placed. But, we ended up liking the effect.

Out finished abstract collage.

Out finished abstract collage.

If I were to do the project over again, I think that I would have kept playing with the conductive tape to figure out the different ways that you could complete a circuit to light an LED. Hopefully, I would have gotten good enough to figure out how to light a menorah. I would also like to explore the idea of incorporating simple circuits into my own art, which could be a great gateway into thinking how to use/implement circuits into a lesson. From the readings, it is clear that maker spaces have the potential to combine fine arts and new media. I hope that in my own classroom that my students will have the option to do either.

Final Project by Annie Silverman

Initial Steps:

The categories I rolled. New media: Vinyl, laser, cnc; Traditional media: Found materials; Theme: Identity

The categories I rolled. New media: Vinyl, laser, cnc; Traditional media: Found materials; Theme: Identity

When I initially saw these categories, I was immediately intimidated by the vinyl, laser, and cnc because of the challenges that I faced while completing the creative assignment for laser cutting. But, I found that it was better that I had another try at it since I could use the vinyl cutter or cnc as well. I also found that because of my challenges, I knew what issues to look out for and think more creatively moving forward in the final project. When I saw I was working with found materials, I was not immediately sure what kind of materials it was. But, I decided that it would be any material or object that I did not make myself. For the theme, identity, I was excited to incorporate into my final project because of the vast possibilities in the subject. Identity development is also a topic that I learned about in artistic development with Judy Burton, and in my class this year, developmental psychology of adolescence. With this in mind, I came up with two initial ideas:
Idea 1: Identity stickers- I would design stickers that labeled or had different aspects of identity written on them for people (myself) to use to stick on found materials that they felt incorporated or contributed to who they are. In this way, I would be utilizing the vinyl cutter, graphic design (Adobe Illustrator), the theme of identity, and found materials as the objects one would put a sticker on. I envisioned that this project would have people putting stickers on anything, from their phone, their sketchbook, or even their bed. The found materials would be anything that they use/have day-to-day that make up their identity. I would also have to think of how I would present my project. If I were to pursue this idea, it would have to be between videotaping people using the stickers, or pictures of the stickers on found materials. The art would be in the act of using the stickers or the product of the found material with the sticker on it.
Idea 2: Chinese paper cutting on glass- This idea is more focused in the theme of identity and how it could be more personal to me. I was adopted from China and growing up, my mother tried to expose and immerse me in my culture as much as possible so that I had the option and opportunity to get to know where I came from. With this in mind and trying to come up with ideas of how to use my new media, I thought of paper cutting. I have a strong background in using Adobe Illustrator, so I thought that outlining and designing a Chinese paper cut to be cut by the laser or vinyl cutter would be a good idea. I also remembered that there is a glass circle shaped table top at my mother's house that I could use for my found material. The circle shape of the glass made me think of the Renaissance art and how only circle shaped paintings would be put into the female bedroom or study. This gave me the idea that I could use the circle shape and traditional Chinese cut design to represent myself.
Moving forward with these ideas in mind, I would have to consider the realistic and not realistic aspects of the projects. I will have to consider my materials, presentation, and time that I would have to put into these projects. My gut says that I will go with my second idea since it is more personal to me.

Process:

While considering the initial steps I took to understanding my dice roll, I decided to approach it differently than what I had previously blogged about. I decided to use an object for my canvas that I had found in my mother's home while I was visiting for Thanksgiving, a matted picture collage frame with a glass front on it. Since I found it in the home where I grew up, I thought using it as a found object along with the theme of identity worked well together.

This is the matted picture collage frame I found in the house I grew up in.

This is the matted picture collage frame I found in the house I grew up in.

 After realizing that I wanted to use this as my found object, I thought about the ideas I had already come up with to fulfill the rest of the final dice requirements. I really liked the shapes and unique composition that Chinese paper cutting art had, so I decided to stick with that as a starting point. I examined different kinds of paper cutting, from traditional to modern. I found that a lot of them are focused in the negative space that it creates. At first, I wanted the design to be in a circular composition. So, in my sketchbook, I printed different designs, pieced them together, and practiced free drawing the designs so that I could then draw them in Illustrator.

This is a picture of my sketches and planned alterations to the Chinese paper cutting design.

This is a picture of my sketches and planned alterations to the Chinese paper cutting design.

After reviewing my options for my circular composition, I found that it did not seem like it was the best fit for the glass object I was going to work with. Instead, on Illustrator, I was able to play around with the composition easily since it was easy to move objects once they were drawn on the art board. Once I outlined the face profile and eye, it looked like the eye shape was filled in too much and it would be a large space that was taken up by nothing interesting to look at. To resolve this, I changed it to a closed eye with emphasis on the eyelashes. In the original design, there was no indication of the neck/back of her head area, so I decided that I would extend it with a floral design commonly found in Chinese paper cutting art. I thought that it would be clever to merge traditional symbols found in Chinese paper cutting art with my modern composition. I also like how the content/theme of my final will also go along well with the traditional and new media dice results.

This screenshot is of my Illustrator file, and how I decided to organize the shapes.

This screenshot is of my Illustrator file, and how I decided to organize the shapes.

Once I had my file ready, I looked into what the process was going to be like to engrave the glass. I found the manual for the laser cutter in the Thingspace and searched for instructions when using glass.

The parameters for using the laser cutter to engrave on glass is as follows (you must work quickly/have all materials ready so that it doesn't dry out, it is also recommended that you should use a flat piece of glass rather than curved but it is possible):

  1. Coat the top of the glass with dish soap so that there is a healthy layer on it

  2. Soak a paper towel or newspaper in water then wring it out so that it is just damp

    1. The size of the paper towel or newspaper should be a bit bigger than the space that you are engraving

  3. Put the paper towel or newspaper on top of glass on the dish soap layer side

    1. Make sure that all of the air bubbles are pushed out of the surface of the glass

  4. The glass is ready to be put into the laser cutter, and from there you would follow the standard steps of using the laser cutter

    1. Make sure that it is flushed to the rulers on the bed of the laser

    2. The speed: 45%; the power: 100%

  5. When the engraving is done, you can brush off the newspaper or paper towel

    1. It is helpful to wash the glass lightly with soap

Below is a video of the laser engraving on glass and pictures of the process:

After working with the laser, I found that there are some things that the manual did not prepare me for. While laser cutting, it is normal to see a flame when working with glass. But, it is not normal to see the newspaper or paper towel curl up off of the surface, in which case, you should stop/pause your laser and reapply dish soap and push down the newspaper/towel back onto the glass. You should also be careful about shifting the glass inside of the bed of the laser (if you have to reapply dish soap).
Due to a series of unfortunate events, the glass shattered:

IMG_6551.jpg

I decided to do the process over again since I was confident that I knew the process better. So, just as I did before, I coated my glass in dish soap (a lot more than I did before) and put a soaked piece of newspaper over it (the newspaper I used was a bit thicker than the normal newspaper, since the second piece of glass seemed more fragile/easily scratched). I also tried to lessen the power of the laser. The parameters I originally used was 45% speed and 100% power. So this time, I used 45% speed and 85% power to start. I found that the power wasn't enough, so I changed it to 90%, which seemed to be enough. Fortunately, starting the laser over again did not make the beginning part of the engraving look vastly different than the rest of it.

Once the engraving was done, I found that the newspaper was not completely burnt off like the first time I tried it. But, it was not a problem since all I had to do was wash the glass, and the burnt pieces came off to reveal a clean engraving.

Next, I thought about what I could put inside of my frame. I figured that I could find more found objects that go along with the theme of identity, but every idea I had did not fit into my frame since the glass pressed down on the surface. I figured I would put a twist on it and put in photos that represented my "found memories" that together, made up aspects of my identity. Using my printer at my apartment, I printed on glossy paper instead of going to CVS to create my photos. This way, the process still felt like I had creative control over it. It was also a good way to introduce myself to a new tool I could use in future work.

IMG_0888.jpg
IMG_7676.JPG

Reflection:

Looking back at my process of making, I found that working in my sketchbook effected the final product in ways that technology would not have been able to. I was glad that my sketchbook slowed down the making of the design and forced me to consider the possibilities of how the image would look, and how to recreate it in Illustrator. Moving from my sketchbook to technology, was slightly worrisome. I was not sure how I would create a single object by using the pen tool with negative space in between it. It was not until I did some trial and error that I discovered how to create a compound path.

These are the steps I took to create the Illustrator file to etch onto the glass with a closed object.

These are the steps I took to create the Illustrator file to etch onto the glass with a closed object.

The rest of the making went smoothly on the computer, but took longer than I expected. The process of figuring out how to laser engrave on glass was a challenge, but one that I am happy I explored. Regardless of my engraving process worked smoothly the first time, I am thankful that I found working on a lower power still resulted with the same ghostly/smokey looking effect. Knowing that I can recreate it twice tells me that I truly know what I am doing.
I believe that I could take this project even further. For me, my final project's value was found in the new process I found when engraving into glass with an image. With my experience in Adobe Illustrator, I think that I could apply the process to a more complex project. When I attended the NAEA event for Artist Statements, peers gave me the idea of using the glass to layer on top of each other to paint portraits. But, after learning this process I think that I could do it differently. I could even experiment with different depths and going over the surface with something that could change the color.
Overall, the process of making the project was a learning lesson that I will not forget. I find that working in traditional/fine art is not and should not be forgotten in classrooms. It should be valued as a tool, building block, and focal point of art. Technology should not be the only material/medium that should be considered when approaching a project. The two should work in tandem to compensate and inform processes and ideas. I will definitely keep this in mind when moving forward in my own art, and when my future students work on projects.

3D Printing: Tinkercad by Annie Silverman

The video shown above is my design on the website Tinkercad to be 3D printed.
The possibilities for 3D printing are endless, and using Tinkercad as a tool to use in printing enables much more creation. Tinkercad makes the 3D printing process more accessible for anyone to use. Since the website has predesigned pieces that are broken up into categories, it was easier to create what I was picturing in my head, opposed to having to recreate the pieces on my own.
3D Printing also allows for practical applications. In conjunction with the categories listed, connectors, people are able to easily create objects that could connect to others without having to "reinvent the wheel" and figure out what shapes they can make that could fit pieces together. With this, one could create a connecting piece to something that already exists, or an object they created themselves. Aside from connecting pieces, the practical aspect of using 3D printing is realistic because of the exact measuring and pre-made/popular objects available on Tinkercad.
Tinkercad is also associated and connected to other websites that involve 3D printing. For example, the website called Thingiverse is an online community where people can post their own designs. These designs can be downloaded onto Tinkercad and remixed based on what the user wants. A website like that provides opportunities for learning and collaboration.
Because of the possibilities of 3D printing and the features on Tinkercad, there are a lot of classroom applications that come to mind. 3D Printing provides a new medium that students can explore in the classroom. Whether they are using it as the sole medium, or combining it with another, they are able to create projects with the new possibilities that new media can provide. They are also able to explore how they could use different materials with a 3D printer. Students can also practice making things that have a practical use to them. They can also collaborate within their classroom and beyond because of the sharing aspect of Tinkercad and Thingiverse. Sharing and collaborating with one another could be really beneficial for their learning and growth. This also presents the opportunity for people to bring their work home with them, and work outside of class. Teachers could also communicate and send projects home to their students because of remote sharing.

Laser Cutting Creative Assignment by Annie Silverman

Wanqiu and I started our assignment by coming up with ideas for creation and communicating them over text message and email. I first sent an email about figurines that I used to play with as a child. They came in packs as sheets of pop out cardboard or wood with slots to put the figure together. For our figures, we decided to . cut a cat, raccoon, seal, and a lion. We each made two of the Illustrator files on our own to then come together and cut them in the Thing Space. Below are the pictures of our process and final pieces!

This is the sketch I drew to then trace with the pen tool on Adobe Illustrator to then send to the laser cutter.

This is the sketch I drew to then trace with the pen tool on Adobe Illustrator to then send to the laser cutter.

This is the sketch I drew for the lion.

This is the sketch I drew for the lion.

Once I traced the drawings on Illustrator with the pen tool. I was able to send it to the laser cutter. Little did I know, that there would be a lot of issues when transferring files from a newer version of Illustrator to an older one. For some reason, there was a mystery clipping mask that showed up on the file once it was transferred. There were also some mystery invisible boxes that were around my images on the file. These issues were found and resolved once I tried sending the file to print on the laser and it wouldn't print. I would press the green button, but it wouldn't cut anything. This definitely meant that there was something wrong with my file that I was missing.

I also ran into issues concerning technical things about the laser. When working with the laser, it is important to consider the material that you are using and how the laser itself is set up. The materials that we were using was left over birch wood scraps from the Thing Space. This presented an issue because the older pieces would catch on fire easily or break when we were trying to put the pieces together. We also ran into issues with the bed of the laser, if it was too far away or up close since many people were using it and changing the height. I would also tell people that they need to consider the weight of their material/the design of their cut so that it is balanced, if they are trying to make it free standing. There were some issues when trying to put the pieces together, but one part of it was too heavy to withstand the weight of itself.

The number one piece of advice and learning lesson for me with this project: It is always important to double check every parameter that could be changed in a long making process like this one.

Overall, I think there are a lot of applications that the laser cutter could have in an art classroom. Throughout the making process, the student is working with design (digitally and physically), color, physics (accounting for how a 2D piece is going to work in 3D), and the laser cutter itself. The project also required a lot of supervision and trouble shooting with a professional, so I could see how in a classroom it could be difficult if there were a lot of students wanting to work with the laser cutter (especially if there are problems along the way).

Scratch Creative Assignment by Annie Silverman

Creating this Scratch game was a challenge. Throughout the making of it, I was constantly experimenting, playing, and troubleshooting what would work and what wouldn't. I was also trying to utilize YouTube tutorials and friends of mine who know how to code. I found that the process of making can be similar to material exploration in fine art. Students could use Scratch to make their creations come to life as animations or interactive games. Scratch also lends the opportunity to use graphic design because of the feature to upload your own designs for sprites and backgrounds.

Stop Motion by Annie Silverman

Creative Assignment:

NMNF_Stop_Motion_Creative_Assignment.gif

The idea for this project was born out of the fact that I have never done this kind of stop motion before, I haven't created my own/original subject in a stop motion video. In the past, I have only moved other objects around in a frame. With this option, it was easier to manipulate the objects to the way that I wanted, I had more control. I was also able to make this video with ease because I had my roommate control the photo taking of the work while I only had to focus on making the objects that were moving around the wall. Below is a picture of the aftermath of my video.

Lesson Plan Idea:

I chose stop motion animation because it involves multiple skills to work in conjunction to create the final product. Stop motion animation is a combination of photography and videography. These mediums also require knowledge about color, composition, and lighting.
When making a lesson plan for stop motion animation, I thought that it would be best to consider how much students know about artistic processes and their cognitive abilities. Younger students will only be able to think concretely, while adolescents will be able to think more abstractly. To challenge their cognitive development and keep the lesson student-directed, I used the idea of transformative cycles to inspire the lesson.
For elementary aged students, I would ask students to consider the world around them and think of things in their lives that change from one thing to another, like in the popular game Pokemon where Pokemon evolve into stronger versions of themselves, or like a caterpillar changing into a butterfly. I would continue a dialogue with my students about other things in their lives that can change from one thing to another. Afterwards, I would let them play with different colored clay to see how they can transform it into different shapes and back again to it's original form. This way, they can discover artistic processes on their own. Once they have had time with the material, I would break them into teams and start having them come up with an idea related to the transformation of things in their world to create a visual representation of that. Students would be able to take this idea in a literal way or in a conceptual way.
For high school students, I would have students also consider the world around them, but in a more conceptual way. Students would think about how they evolve themselves, and how they change over time. They would be self-reflecting for the basis of their projects. Their projects could be themed biologically, mentally, emotionally, and maybe how the transformative cycles around them have changed them. As students consider this concept, they would be playing and breaking down the aspects of stop motion animation. Students will explore different ways of making a stop motion animation with different mediums and different ways of taking the photos for the video. They will also explore ways of how to edit the video pre or post production. They would choose which medium they want to work with based on how well they can demonstrate their concept with it.
Based on adolescent cognitive development of students at different ages and creating open-ended lessons, I thought that these lesson plans would be appropriate.

Sound Creative Assignment by Annie Silverman

For this assignment, I used Adobe Audition to mix my sounds. The first sound was taken on the subway platform, the second in Central Park, the third at a craft fair, and the last of myself typing. I spliced them together and mixed the clips individually to create the piece.

Observations of Sound in Life, Arts, and Curriculum by Annie Silverman

Reflecting upon the prevalence of sound in my life in terms of art and curriculum, there are not many instances where I worked with or experienced sound art.
I did not experience sound art until my undergraduate career, and even then, I did not know much about it and did not ever create it myself. I just knew that a lot of sounds were connected to installation pieces to contribute to their ambiance.
More recently, over the summer, I went to the Edward Hopper House in Rockland, NY, where they had an interactive sound installation in their garden. It was set up in a corner area of the garden, somewhat behind the porch, which did not give it much visibility or incentive to interact with the installation. It did not look like something that someone could interact with either, it could have been a supportive structure for a future piece or something that the museum coordinators have not cleaned up yet. It was a white structure made of small speakers and motion sensors that were placed in a somewhat closed geometric shape. People could walk through it and as they did, sounds from conversations and opera songs in different languages would come on.
After seeing this, it had me thinking about the potential for sound in a curriculum. I thought that it worked well with the visual/installation component. Although sound art does not need to have a visual component to it, I think it only adds to the concept of the art. Based on that, I do think that it is not enough to just have structure that emits the sound, like the one at the Edward Hopper House. The artist should consider the presentation as well. Overall, it was interesting to hear a story being told through sound, which provides a lot of interpretation on the side of the audience. In terms of curriculum, students would be able to essentially learn how to create an environment and tell a story with sound. In addition, working with sound provides the opportunity to enable students with a visual impairment. Since most students have a smart phone, sound art can be cost effective for a class since they will not have to purchase recording devices. But, there could be a deeper learning curve for the editing software teachers use for mixing sounds. Because it is also a digital media, there are also opportunities to apply sound to other digital medias. In terms of curriculum, it would be refreshing to have students record or make their own sounds to put together a larger piece.

Creative Potential of Videography by Annie Silverman

Videography is the process of making a video. The depth of history, technique, and process behind the medium is great, which lends a lot of opportunity to utilize it in the classroom. People can make videos for a variety of reasons; entertainment, public service announcements, documentation, and promotion. In classrooms, videography can be easily conducted, can give students a voice, and can teach concepts in art.
Videography has evolved from copying images onto a film strip to recording images digitally. Being able to work with a digital medium provides options for tools that could be used for filming. A student could use their own phones or cameras, and classroom iPads or cameras to film their ideas. Because of the many kinds of filming devices, the clean up for making is much less than it would be for painting, which gives students more time to develop their process. In addition, students would be able to edit their work on various platforms. If they are using their phones, there are many applications they can choose from for the post production of their film. They could also upload their video to a computer so they could use better software for editing. Furthermore, students can share their work with others easily. In a classroom, they can easily conduct a critique by sharing their video on Google Classroom, or sending it to the main classroom presentation computer. Students can also share their videos on social media to reach a larger audience. Having the ability to share increases students communication and analytical skills.
Through the use of videography, students will have the chance to share their point of view with others. While this can also be done through the use of a painting or photo, a video gives students multiple dimensions to work with when showing their story. Students can factor in aspects of sound and multiple perspectives that other mediums cannot.
The process of making a video can be broken down by the dimensions of the plot, the pre and post production, and the division of job titles. All of these aspects of videography gives opportunities to practice and learn about story/plot, dialogue, scene sequence, mise-en-scene, cinematography, editing, sound, and analysis. These components are also related to other concepts in art such as composition and color theory. Through videography, students can put their knowledge of art and video together to represent ideas.

Scanography Creative Assignment by Annie Silverman

My Ebook is broken up into two series. The first one illustrates my exploration process with one flash gel light leak, and the second is my exploration with two flash gel light leaks. Both series is shown on the second page in two rows. The proceeding pages are the individual scans that are digitally edited to my liking.

The Potential of Scanography by Annie Silverman

Scanography is the process of capturing digitized images of a subject using a scanner, which could be in the form of a flatbed, handheld, or double sided scanner. In my opinion, this artistic process creates a depth within the image that cannot be captured using another medium. Certain kinds of scanners can also limit or increase the potential of what kind of objects it can capture. The objects on the scan bed have a light that is shined on them, and reflected on another surface to create an image. The harshness of the light source creates a drop shadow around the object, and typically darkens the background, which creates depth. The prolonged light source also lends the opportunity for long exposure techniques also used in digital photography.
Scanography shows a lot of potential in terms of how the subject can be captured and presented. For example, if someone was capturing flowers, they could either show them pressed on a flatbed or shown in an environment with a handheld scanner. The artist can also choose to have more or less objects also shown in their work. When using a flatbed scanner, one can use movement to show parts of object throughout their piece. Since the subject is being captured digitally, this lends a lot of possibilities for presentation. One can simply print their work, show it digitally, or apply the effects of the scanner to other art mediums. Realizing these potentials can also be applied to art making in a classroom. Teachers could utilize the process of scanography to enhance lighting, composition, and critiquing skills because of the flexibility of the medium.

Digital Photography: Noticing Project by Annie Silverman

Assignment:

This project was started in class. We were asked to look around campus and take pictures of things that we notice about our environment.

Original Noticing Photograph

Original Noticing Photograph

After taking this photo, I feel that I could pursue an art project based on the subject and shapes that appear in it.

The photo is taken from the bottom of a staircase looking upwards. The effect that it makes on a two dimensional surface is interesting to me because of the receding line, and you get to see a different perspective of a subject you do not often see. For a project, I could take this further by taking pictures of staircases from visually interesting perspectives. I would not want to limit myself with the bottom to top perspective is the staircase is designed differently. The original photo that I took has not been edited, so I could also take this further by digitally editing the photos to be more interesting. I could also play around with editing to see if I could create a forced perspective.

Another aspect of this photo I find compelling are the monochromatic geometric shapes that emerge. I think that together, they create an interesting composition and element of design that supersedes the subject. I could take pictures of geometric shapes that I find interesting based on color. The result can be minimal if one focuses on the simple shapes that are created or if one focuses on the monochromatic colors shown. But, the artwork can also be viewed as complex if a viewer considers both elements, color and shape. This could be interesting to pursue because I would not be limited to the subject of the piece.
Based on the responses I have gotten about these two ideas, it seems like people are most excited about the pictures of staircases. My first challenge is to find staircases that I could get interesting perspectives of. I spent the day walking around my neighborhood looking for places with interesting stairs, and realized that it was a task that was easier said than done. Eventually, I decided to take a trip to the Met Breuer since I have never been there before. Along the way, I passed the Met Fifth Avenue steps and tried to find a creative way to photograph their iconic steps.

The Metropolitan Museum of Art Steps

The Metropolitan Museum of Art Steps

I hoped that in this photo, I could accomplish the task I gave myself of taking photos of stairs at unique perspectives, and capture the energy surrounding the area. The steps being shown in this perspective is not one that many people see the steps from when they visit the museum. They are usually looking at the steps from the front of the building to walk up to the prestigious institution, which is matched by the overcoming amount of steps there are leading to the entrance. The people shown around the steps also reflect the tone of the museum. It is clear that there is a diverse group of people that go to the Met. The excitement around the Met is also reflected by some of the tourists taking selfies, and by the multitude of people making their way up the steps.

My Building

My Building

This next photo is one of the stairs leading up to the second floor of the building. I found this view to be most compelling because of the shapes that are made in the ceiling from the stairs. This perspective was also unique to me because I had never looked at the building or architectural components that needed to be made in order to compensate for a stairwell.

The Met Brewer

The Met Brewer

The next few photos are from the steps at the Met Brewer. I thought about taking pictures there because of the concrete and modern style architecture the building has, and I figured that the staircase had to reflect those qualities as well. The picture above was taken from the bottom up like my first inspiration photo. I found this perspective interesting because you can see the outlines of the stairs and not just the ceiling like in the first picture or in my building. I also found this interesting because of the lighting. The light was filtering through my lens differently than in the other locations because of the placement of the lights, which I assume is from the unique architecture and lack of natural. The light then created a leak that is shown in the bottom right corner of the photo.

The Met Brewer

The Met Brewer

This photo is similar to the previous one because of its looking upward perspective, but the lighting had a different effect on this photo since it is directed at the camera. I found this photo interesting because of the lack of light shown on the stairs. The color and darkness of the photo contributes to the tone of the Met Brewer and the stairwell. It perfectly embodies the cool and industrial feeling that the building was designed with. In terms of teaching and curriculum, I would find the differences between these photos to represent the importance of light placement in photography.

The Met Brewer

The Met Brewer

This photo was interesting to be because of the perspective it forces the viewers to see and the warm tones brought out of it. First, taking the photo at this angle was somewhat difficult. I had to lean over the side of the handle bar to look downwards to the street level of the stairs. It was almost difficult to hold the camera still because of the gravity of the angle I was at. Second, the color of the handle contributed to the warm tones brought out by the pure white lights in the stairwell. This was an aesthetic touch that I appreciate because it offsets the colder feeling people might get surrounded by concrete.

The next two photos are taken from the same angle but edited differently. The first photo is cropped so you could see the ceiling of the stairwell, the top sliver of concrete. It is also edited to include more highlights and mid-tones than the other. For both photos, I chose to edit them based on their compositional potential and slight change in perspective.

The Met Brewer

The Met Brewer

For this first photo, I chose to crop it with more of the right side of the stairs shown because of the slight angle towards that side of the stairwell. I figured that the photo should be cropped based on the way that the lens was angled, hence where the audience should be looking. I also chose to crop it so that part of the top of the ceiling was in it to balance the shadows made from the light pouring in from the top of the staircase and the light at the bottom left corner of the photo. I thought that the warm light of the ceiling would be a good "break" for the viewers eyes to make sense of the many shapes the light was making against the staircase.

The Met Brewer

The Met Brewer

This next photo was cropped the way it was because it was taken, mostly, in the center of the stairwell. I wanted to make this photo as balanced as possible. When keeping this in mind, I also knew that I had to compensate for the light leak int he bottom left hand corner of the photo, which lead me to be mindful of the gradient from light to dark in that corner. If the change from light to dark was too sudden, by cropping it too closely on the left, than it could direct viewers attention to that harder edge it would have created. So, I made sure that I left enough light in the corner to see the slow transition from light to dark. I also enjoy the way it was edited because of the dark shapes that take up most of the space, but also how it is balanced with the out of focus highlights that are receding into the background.

The Met Brewer

The Met Brewer

This last photo was taken while I was standing on the steps and looking to the side to see them at eye level. I cropped and rotated the photo to be at the angle of the railing because it would give people a new perspective of the staircase. I also thought that it would take a viewer a moment to figure out what the subject is, which adds to the unique perspective of the photo.
Overall, I think that this creative response was a success. I think that I could take this idea of noticing and translate it into a lesson for students in a beginners photography class. In this way, students would be able to take pictures of things that are of interest to them, explore the use of their camera, learn critique and technical terms of photography, and translate their formal knowledge into creative art making.

Digital Photography in the Classroom by Annie Silverman

Digital photography is a pliable and forgiving medium, which makes it perfect to incorporate in a classroom curriculum. 

There are many possibilities in the process of taking a photo digitally. One can take a photo using their camera phone, DSLR, tablet, or simple digital camera. Because there are so many "modes" of creation, it gives students options for how they want to proceed with a project artistically and provides options for students that might not own a digital camera. Most digital cameras also have different settings to choose from that change the visual aspects of a photo before editing on another software. Students are also able to take multiple pictures of the same subject with the same camera or different ones based on the look they want their photo to have. This can also be useful in a classroom because there is no "clean up" to creating multiple photos.

In addition to changing the settings on a camera, students are able to transfer their photos to computer programs to apply new effects to their photos or create something entirely new. For example, students can alter their photo by cropping it, changing the white balance, and putting a filter over it. Students working in design can also apply aspects of their photos to their designs and their designs to their photos.

Apart from graphic design, digital photography can also be applied to other new media and fine art. In terms of new media, photos can be used in videography. This could be a good opportunity for students to work collaboratively as well. Digital photography can be used as a tool or a medium in the fine arts too. Students can uses photos as a reference for other art work. They can also use it to layer into their other works after printing it.

The ability to apply digital photography to other areas of art gives students the opportunity to exercise their critiquing techniques by choosing what kind of effect they want when taking a photo. It also gives teachers many areas to explore with their students, which is helpful when students have different interests they might want to pursue.